Lord Knight Apocalypse build: MVP, raid and PvP
Lord KnightAs of 13 October 2026 (SEA, Lv.90, Apocalypse Season 1)

Lord Knight in the Lv.90 Apocalypse era: a 2H sword with Sword Saint for MVPs, a sword-and-shield Kindling Flame tank for Calamity Zone, and a Coiled Strike spear for PvP, with armor, cards, starcores and runes for each.
Our take
The RO New World team's own view
- For Lord Knights who want real boss damage and a spot in Calamity Zone parties. If you only want to burst players, the Spear is still our PvP pick, but it is no longer our boss build.
- Get a Royal Muramasa III with Sword Saint first: +42% damage with swords at red, and it works on MVPs, in PvP and in the raid. Then build Guard before Break: Guard 80, then 160, then 240.
- The biggest trap is keeping the Spear for bosses out of habit. Coiled Strike adds one Clashing Spiral hit every 2.1 seconds; Sword Saint adds 42% to all sword damage. The second trap is putting Aggressive or Defensive on MVP and PvP starcores, where they do almost nothing.
- Our verdict: the 2H sword is the Lord Knight's main Apocalypse weapon. Add a Kindling Flame sword and shield when your raid group needs a tank, and build the spear last, only if PvP is your main mode.
Key findings
Sword Saint moves boss damage to the sword
At red quality, Sword Saint gives +42% damage to basic attacks and skills with a sword, and the game counts Sword Qi from Surging Sword Aura as a sword skill. Coiled Strike only gives Clashing Spiral one extra hit every 2.1 seconds, on a skill that already hits 5 times (6 with Rapid Spiral). At Lv.70-80 the Spear hit bosses hardest; with Apocalypse the 2H sword takes over.
Lord Knight is the raid tank
Taiwan players call Knight the only class with a full tank kit, and their raids needed a tank from Hard difficulty up. Brave Strike, Burning Blood, Auto Counter and Parrying carry the Resilience tag in the game data. Kindling Flame gives them +8.3% damage per stack, up to 5 stacks, plus 6% healing received per stack, while Burning Blood is active.
One class trait per weapon
The class trait rolls only on weapon Starcores, so each build here needs its own Apocalypse weapon: Muramasa for MVP, Blood Eater for the raid tank, Cardo for PvP. If you can afford only one, make it the Royal Muramasa III with Sword Saint. It covers MVPs and PvP, and joins a raid as damage when your party already has a tank.
Armor
Wear the General Set II
General Set II
BestBest for MVP hunting



- Set: STR +5, DEX +5, physical damage +2.5%
- Each piece: physical damage +2.2%, plus +0.4% per refine level
- Total at refine +10: physical damage +21.1%
Gale Set IV
OptionUntil your ASPD is capped



- Set: HP cap +5%, physical damage +2%
- Each piece: AGI +6, ATK +28, plus +0.38% physical damage per refine level
- Total at refine +10: AGI +18, ATK +84, physical damage +13.4%
Odin Set III
OptionPvP spear build



- Set: STR +6, INT +6, ATK +2%, M.ATK +2%
- Each piece: ATK +1.4% and +0.24% physical damage per refine; the armor adds STR +1, cape and shoes DEX +1 and VIT +1 per refine
- Total at refine +10: ATK +6.2%, physical damage +7.2%, STR +16, VIT +20, DEX +20
Goibne Set III
OptionRaid tank build
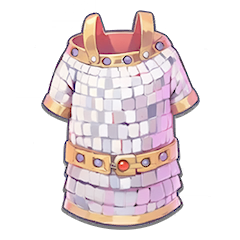
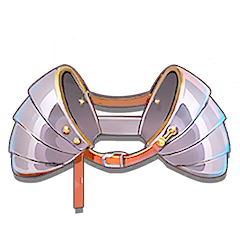

- Set: VIT +6, Max HP +800, P.DEF +20, Wind/Earth/Water/Fire skill damage taken -5%
- Each piece: VIT +6; the armor adds VIT +1 and Max HP +0.6% per refine, cape and shoes cut those 4 elements' damage by 0.6% per refine
Orange (gold) quality, refine +10, from the game data. Royal pieces have the same bonuses plus more HP. On Taiwan's server with the Lv.80 versions, General gave physical damage +19.3% and Gale +12.2% plus AGI and ATK, so General wins once attack speed is full and Gale wins while it is not.
II · MVP hunting
MVP build: 2H Sword
Neutral · Sword SaintBasic attacks at full attack speed, while Surging Sword Aura, Rending Wound and Auto Combo fire on their own. Sword Saint adds 42% to all of it, the biggest single bonus a Lord Knight can get.
Stats
AGI 99
Max it first. On Taiwan's server, AGI 99 plus Special Skill Master or 4 Gale runes reached full attack speed
ASPD 193
The cap, with attack frequency 7. Food and party buffs close the last gap
STR
Everything left after the ASPD cap
Apocalypse weapon trait
Sword Saint
Basic attacks and skills using Swords deal +7~42% DMG.Apocalypse weapon trait (red): basic attacks and skills using swords deal +42% damage (orange +28%). It is always on, so it works on MVPs, against players and in the raid.Gear
 Royal Muramasa IIILv.90 · ATK +350While Aura Blade is active, P.DMG Bonus multiplier +14%
Refine +5. While Aura Blade is active, P.DMG Bonus multiplier +7%Royal Muramasa III: ATK +350. While Aura Blade is on, physical damage multiplier +14%, rising to +21% at refine +15, and from +10 it ignores 35% P.DEF. Alternative: Royal Executioner V (Bowling Bash +14%, +21% at +15). On Taiwan's server, Muramasa tested about 7% ahead but cost 8-10 times more.
General's Assault Armor IILv.91 · HP +8329P.DMG Bonus +2.2%For every Refine Lv. +1, P.DMG Bonus +0.4%General Set II: armor, cape and shoes. Physical damage +21.1% at refine +10.
 Royal Rogue's Treasure IIILv.90 · HP +2677 · ATK +75 · DEX +8P.DMG Bonus +2.8%
For every Refine Lv. +1, P.DMG Bonus +0.4%Royal Rogue's Treasure III: physical damage +2.8%, plus 0.4% per refine. With Cold Heart the set adds ATK +2% and physical damage +2%.
 Royal Cold Heart IIILv.90 · HP +2677 · ATK +75 · STR +8Ignore P.DEF +35
Refine +5, Ignore P.DEF +1.4%Royal Cold Heart III: STR +8 and ignore P.DEF +35, more with refine.
 Royal Morrigane's Pendant IIILv.90 · HP +2677 · ATK +75 · AGI +8ASPD +1.4%
Refine +5, ASPD +1.4%Royal Morrigane's Pendant III: only while you are short of the ASPD cap. ASPD +1.4%, with +4.2% more at refine +15.
Special skills
 Surging Sword AuraWeaponDuring the duration of Spirit Qi Sword, using sword normal attacks will accumulate Sword Intent, lasting 4s, stacking up to 10 layers; when possessing Sword Intent, heal yourself 5~100%*Atk HP per second (not exceeding 0.01~0.2% of max HP), and normal attacks have a 1.2~10% chance to release Sword Qi, dealing 700% non-elemental melee PDMG to up to 5 enemies in a 4m straight line; each layer of Sword Intent additionally increases 5~100%*Atk healing and 1.2~10% Sword Qi release chance. Sword Qi is considered a Sword-type skill.Surging Sword Aura: during Aura Blade, sword basic attacks stack Sword Intent (up to 10) and can fire Sword Qi, 700% Neutral damage to up to 5 enemies in a line. Each stack adds 10% chance. First on Taiwan's red list.
 Rending WoundAccessoryWhen dealing PDMG, has a 14~60% chance to cast Traumatic Blow Lv.5 on the target. Cast level increases based on the learned skill level. This effect has a 0.8~1.3s cooldown. Damage dealt to Bleeding enemies +1~14%.Rending Wound: 60% chance on physical damage to cast Traumatic Blow (bleed), and +14% damage to bleeding targets. Second on Taiwan's list.
 Auto ComboAccessoryWhen a Basic Attack hits a target, has a 2~50% chance to cast Bowling Bash Lv.5 on the target. Cast level increases based on the learned skill level. This effect has a 0.8~1.2s cooldown.Auto Combo: basic attacks have a 50% chance to cast Bowling Bash (0.8 s cooldown). Bowling Bash is a sword skill, so Sword Saint boosts it too.
 Elite GuardCapeDMG taken from MVP, Mini, and Boss -0.5~27.5%.Elite Guard: damage taken from MVP, Mini and Boss -27.5%.
 PDMG ReductionArmorWhen taking damage, PDMG taken -0.7~35.8% for 5s.PDMG Reduction: when hit, physical damage taken -35.8% for 5 s.
 Blazing BladeAlternativeFor each enemy hit by Magnum Break, gains 1 stack of Scorching: ASPD +0.4~1.8%, ATK +0.8~3.6%. Stacks up to 6 times and lasts 6~8sBlazing Blade, instead of Auto Combo while you are short of ASPD: each enemy hit by Magnum Break gives ASPD +1.8% and ATK +3.6%, up to 6 stacks for 8 s.
Cards
Weapon (size)
Match the MVP's size: Minorous for Large, Skeleton Worker for Medium, Desert Wolf for Small, each +10.8-18%. Size cards say DMG, so they work on every physical hit.

Weapon (race)
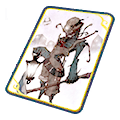
Second slot by target: Strouf (Demon), Santa Poring (Shadow), Pecopeco Egg (Formless), Goblin (Brute), each +12-20%. Nothing fits? Panzer Goblin (melee physical +6-10%).



Accessory ×4
Phendark (melee physical damage +3.6-6%), or Bongun (+3-5%) as the cheaper copy.

Armor ×2

Shoes ×2
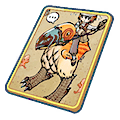
Wild Rose (STR +6-10) or Zombie (STR +3-5). Male Thief Bug (AGI +3-5) only while you are short of ASPD.




Starcore traits, in priority order
Weapon
- Sword Saint
- Melee PDMG%
- Neutral DMG%
- ATK%
Accessory
- Melee PDMG%
- Neutral DMG%
- ATK%
- ATK
Armor
- Max HP%
- DMG Reduction vs Large%
- Melee PDMG Reduction%
- HP
Cape
- Elemental DMG Reduction%
- Melee PDMG Reduction%
- Ranged MDMG Reduction%
- M.DEF%
Shoes
- DEF%
- Melee PDMG Reduction%
- Ranged PDMG Reduction%
- Elemental DMG Reduction%
Rune Engine
Aqua Crystal 7
Increases P.DMG and M.DMG by 6%; Ignores 10% of target's P.DEF and M.DEF upon dealing DMG. Casting a skill has a base 15% chance to deal 40% bonus DMG. Failure adds 5% to the next attempt, stacking until triggered.Gale Crystal 4
All Stats +10ASPD +4%, Fixed Chanting Time -10%Lumina Crystal 4
Increases healing effects and healing received by 9%. Reduces DMG taken by 8% when in abnormal status. Increases DMG dealt to targets in abnormal status by 8% Desperate StrikeIncreases P.ATK and M.ATK by 2~12%. Reduces P.DEF and M.DEF by 2~12%Desperate Strike: P.ATK +12% for 12% less P.DEF. Top of Taiwan's list for this build.
 Layered BladeStacks when dealing DMG. Each stack increases DMG by 0.8%, up to 20 stacks, lasting 10s. After acquiring , gain 5 stacks each time DMG is dealt.Layered Blade: +0.8% damage per hit, up to 20 stacks. Fast basic attacks keep it full.
 Special Skill MasterWhen using the same skill consecutively, ASPD increases by 12% for 5s. After acquiring , ASPD increases by an additional 5%.Special Skill Master: ASPD +12% (+5% more) when you use the same skill again and again. Helps you reach the cap.
 Balanced DefenseWhen HP is above 50%, DMG multiplier increases by 12%. When below 50%, DMG taken is reduced by 12%Balanced Defense: damage multiplier +12% above 50% HP, damage taken -12% below it.
 Abnormal Damage BoostIncreases DMG multiplier by 2~12% to targets with abnormal statusAbnormal Damage Boost: +12% against targets with a status. Bleed from Rending Wound counts.
Reroll affixes last: ATK%, melee physical damage, then ASPD if you are still under the cap.
How to play
- Cast Aura Blade, Concentration and Burning Blood first, then keep basic attacks going. Muramasa and Surging Sword Aura both work only during Aura Blade.
- Swap the two weapon cards before each MVP: one size card, one race or element card.
- Do not fight on the Peco Peco without Cavalry Training. Riding cuts your attack speed, and this build lives on attack speed.
- On Taiwan's server, two orange 4 colors plus 5 useful runes beat a 7 color with only 2-3 useful runes. Get Aqua 4 and Gale 4 first, then push Aqua to 7.
III · Calamity Zone raid
Raid build: Sword and shield tank
Fire · Kindling FlameHold the boss for your party from Hard difficulty up. Brave Strike heals you as it hits, Burning Blood gives a fire shield, and Kindling Flame makes both stronger the longer Burning Blood stays up.
Stats
VIT 99
Max it first. Blood Eater counts every 15 VIT, every 10 VIT from refine +10
STR
Everything left
Guard 80, 160, 240
Guard first: 80 for Pharaoh, 160 for Dark Lord and Anubis, 240 or more on Hard
Apocalypse weapon trait
Kindling Flame
While Burning Blood is active, gain a stack of Kindling every second, increasing Received Healing by 1~6% and Resilience skill damage by 1.4~8.3%. Lasts 3s, stacking up to 5 times.Apocalypse weapon trait (red): while Burning Blood is active, you gain a stack every second, up to 5, each lasting 3 s. Each stack: healing received +6%, Resilience skill damage +8.3%. Brave Strike and Burning Blood are Resilience skills.Gear
 Royal Blood Eater IIILv.90 · ATK +250Every 15 VIT increases Brave Strike DMG and Healing by 1.2%
Refine +5, Brave Strike DMG multiplier +12%, Healing +12%Royal Blood Eater III: ATK +250. Brave Strike damage and healing +1.2% per 15 VIT (per 10 VIT from +10), +12% at +5 and +28% at +15. On Taiwan's server a Lv.90 Royal one-hander carries about 125 Break.
 Royal Giant Shield IVLv.92 · HP +2677 · DEF +20DMG Reduction vs Large +4%, HP +4%
Refine +5, DMG Reduction vs Large +2%Royal Giant Shield IV: damage from Large -4% and HP +4%, up to 6% more reduction at refine +15. All five Season 1 bosses are Large. A Royal shield carries about 50 Guard on Taiwan's server.
Goibne Armor IIILv.91 · HP +8329VIT +6, Max HP +850For every Refine Lv. +1, VIT +1, Max HP +0.6%Goibne Set III: VIT, HP, P.DEF and less Wind, Earth, Water and Fire skill damage.
 Royal Flower Ring IIILv.90 · HP +4462 · VIT +8HP +3.6%
Refine +5, HP +2.4%Royal Flower Ring III: VIT +8, HP +4462 and Max HP +3.6%, more with refine.
 Royal Kind Heart IIILv.90 · HP +2677 · DEF +20 · M.DEF +10Healing Effect +7%, Received Healing +4%
For every Refine Lv. +1, Healing Effect +0.8%, Received Healing +0.5%Royal Kind Heart III: healing received +4%, plus 0.5% per refine. With Flower Ring: VIT +6, healing +3%. If your healer keeps you full, swap both for Rogue's Treasure and Cold Heart.
Special skills
 Fearless ActWeaponBrave Strike cooldown -0.5s, DMG multiplier and Healing +1.2~42%.Fearless Act: Brave Strike cooldown -0.5 s, damage multiplier and healing +42%.
 Boiling BloodAccessoryEach time Burning Blood deals damage, Brave Strike cooldown -0.4~1s. Burning Blood duration +1~5s, and damage +0.6~33%.Boiling Blood: Burning Blood lasts 5 s longer and deals +33%, and each hit cuts Brave Strike cooldown by 1 s. Longer Burning Blood keeps Kindling Flame at 5 stacks.
 Wrath ReleaseAccessoryReplaces Berserk with Wrath Release. Wrath Release: Can only be cast when HP is above 5%. Enter Wrath Release state. During this state, ATK +0.6~21% and Resilience Skill DMG multiplier +1.5~50%. However, lose 1% HP per second. Cast again or drop below 5% HP to clear this state.Wrath Release: replaces Berserk. ATK +21% and Resilience skill damage multiplier +50%, but you lose 1% HP per second. Turn it off in heavy damage phases.
 Large Monster GuardArmorDMG taken from large units -0.5~27.5%.Large Monster Guard: damage taken from Large units -27.5%. Every Season 1 boss is Large.Elite GuardCapeDMG taken from MVP, Mini, and Boss -0.5~27.5%.Elite Guard: damage taken from MVP, Mini and Boss -27.5%.
 Unshakable GuardAlternativeWhile shielded, Slow RES +8~36% and damage taken -0.6~33%.Unshakable Guard: while you have a shield, damage taken -33%. Burning Blood gives a shield; test whether it counts before you replace Elite Guard.
Cards
Weapon ×2
Minorous (damage vs Large +10.8-18%) works in all five fights. Second card per boss: Injustice for Amon Ra, Santa Poring for Pharaoh and Bloody Knight, Strouf for Dark Lord.
Off-hand
Frozen Gargoyle (damage from Large -12-20%) always. Per boss: Thara Frog for Amon Ra, Pharaoh and Anubis, Khalitzburg for Dark Lord, Penomena for Bloody Knight.



Cape ×2
Raydric (Shadow damage taken -6-10%) for Pharaoh and Bloody Knight; Eclipse (VIT +4-6) for the other bosses.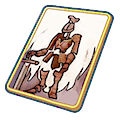


Headwear ×2

Face and mouth
Arc Angeling (Max HP +2.4-4%) and Mirage: Osiris (Max HP +3.6-6%).

Accessory ×4
Phendark or Bongun for melee physical damage. In a 5-player party your damage still counts.Starcore traits, in priority order
Weapon
- Kindling Flame
- Aggressive
- Melee PDMG%
- ATK%
Off-hand
- Defensive
- Max HP%
- DMG Reduction vs Demi-Human%
- Received Healing%
Armor
- Defensive
- DMG Reduction vs Large%
- Max HP%
- DMG Reduction vs Demi-Human%
Cape
- Defensive
- Elemental DMG Reduction%
- DMG Reduction vs Demi-Human%
- Melee PDMG Reduction%
Shoes
- Defensive
- DEF%
- DMG Reduction vs Demi-Human%
- Melee PDMG Reduction%
Accessory
- Aggressive
- Melee PDMG%
- ATK%
- Neutral DMG%
Rune Engine
Lumina Crystal 7
Increases healing effects and healing received by 12%; Reduces DMG taken by 10% when in abnormal status. Increases DMG dealt to targets in abnormal status by 10%. When receiving or applying healing effects, increase all control resistance of self and target by 15% and P.ATK and M.ATK by 8% for 8 secGeo Crystal 4
Reduces DMG received from all Classes by 3%Upon entering combat, gain a shield of 10% max HP every 15s, lasting 15s. Enemies attacking the shield have their P.ATK and M.ATK reduced by 3% for 5sAqua Crystal 4
Increases P.DMG and M.DMG by 4%. When dealing damage, ignores 5% of the target's P.DEF and M.DEF. Healing AssaultHealed targets gain 2~12% P.ATK and M.ATK. You gain an additional 1~3%. Lasts 10sHealing Assault: healed targets gain P.ATK +12% for 10 s, and you gain 3% more. Brave Strike heals you all the time.
 Burst AmplificationIncreases burst skill DMG multiplier by 2~12%Burst Amplification: burst skill multiplier +12%. Brave Strike is a burst skill in the game data.
 Mighty GuardWhen taking single DMG exceeding 10% of max HP, reduces DMG by 4~24%. 15s cooldownMighty Guard: a single hit above 10% of your Max HP is cut by 24% (15 s cooldown). Made for boss slams.
 Crippled ArmorReduces DMG taken by 12%. For every 20% HP lost, DMG taken is reduced by an extra 1%. After acquiring , the HP-loss interval is adjusted from 20% to 10%.Crippled Armor: damage taken -12%, and a little more as your HP drops.
 Indomitable WillRestores 6~36% HP over 5s when HP is below 50%. 40s cooldownIndomitable Will: below 50% HP, restores 36% HP over 5 s (40 s cooldown).
Reroll affixes last: Max HP%, damage reduction vs Large, then ATK%.
How to play
- Build Guard before Break: step up to Guard 80, then 160, then 240. A dead tank wipes the party; missing Break only lowers your damage.
- Stellar Power: when all 4 traits on a slot share one quality, the slot's season stat rises (blue +30%, purple +50%, orange +70%, red +100%). Match colors on the armor, cape, shoes and shield first.
- Open with Charge Attack and Provoke, then turn the boss away from the party.
- Keep Burning Blood up with no gaps. Kindling Flame stacks last only 3 s, and Boiling Blood adds 5 s to every cast.
- If your party already has a tank, bring the MVP sword instead, with Aggressive on weapon and accessory and Defensive on armor, cape and shoes.
IV · PvP
PvP build: Spear burst
Neutral · Coiled StrikeCharge in, stun, and finish with Clashing Spiral before the target can react. The Spear keeps its PvP place because Charge Attack gets 3 m more range with a spear and stuns instead of rooting.
Stats
STR 80-85
Your damage stat
VIT 70
About 70 so you survive the reply
No DEX
Clashing Spiral has no cast time
Apocalypse weapon trait
Coiled Strike
Every 2.1~13.9s, the next Clashing Spiral cast triggers an additional hit.Apocalypse weapon trait (red): every 2.1 s, the next Clashing Spiral gets one extra hit (orange: every 3.4 s). PvP fights come in short bursts, so the extra hit is ready for almost every opener.Gear
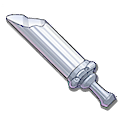 Royal Cardo IIILv.90 · ATK +350Clashing Spiral DMG multiplier +14%
Refine +5, Clashing Spiral DMG multiplier +7%Royal Cardo III: ATK +350. Clashing Spiral damage multiplier +14%, rising to +21% at refine +15. Clashing Spiral also scales with weapon weight.
Odin's Blessing IIILv.91 · HP +8329ATK +1.4%, M.ATK +1.4%For every Refine Lv. +1, STR +1, INT +1, P.DMG Bonus +0.24%, and M.DMG Bonus +0.24%Odin Set III: at refine +10, ATK +6.2%, STR +16 and VIT +20 for a STR/VIT build.
Royal Cold Heart IIILv.90 · HP +2677 · ATK +75 · STR +8Ignore P.DEF +35Refine +5, Ignore P.DEF +1.4%Royal Cold Heart III: ignore P.DEF +35, which matters most against geared players.
Royal Rogue's Treasure IIILv.90 · HP +2677 · ATK +75 · DEX +8P.DMG Bonus +2.8%For every Refine Lv. +1, P.DMG Bonus +0.4%Royal Rogue's Treasure III: physical damage +2.8% plus 0.4% per refine, and the set bonus with Cold Heart.
Special skills
 Maelstrom GlaiveWeaponClashing Spiral creates a vortex at the target location, dealing 18~630% Neutral Melee PDMG to enemies within 2m. The vortex has a 6~100% chance to cast Joint Beat Lv.5 on the target, based on the learned skill level. The vortex is treated as a Spear skill.Maelstrom Glaive: Clashing Spiral leaves a vortex, 630% Neutral damage within 2 m, with a 100% chance to cast Joint Beat (Fracture).
 Rapid SpiralAccessoryClashing Spiral hit count +1, damage +0.8~28%.Rapid Spiral: Clashing Spiral +1 hit and +28% damage.
 Ruthless HuntAccessoryDamage dealt to enemies under hard control or Fracture +0.8~28%.Ruthless Hunt: +28% damage to targets under hard control or Fracture. Charge Attack stuns and the vortex fractures, so it is almost always on.
 Duelist GuardArmorDMG taken from players -0.5~27.5%.Duelist Guard: damage taken from players -27.5%.PDMG ReductionCapeWhen taking damage, PDMG taken -0.7~35.8% for 5s.PDMG Reduction: when hit, physical damage taken -35.8% for 5 s.
 Devastating ChargeAlternativeWhen Charge Attack hits an enemy, applies Vulnerable and reduces all Control RES by 44~100% for 5~10s.Devastating Charge, instead of Ruthless Hunt in Guild League team fights: Charge Attack applies Vulnerable and cuts the target's control resistance by 100% for 10 s.
Cards
Weapon ×2
Hydra: damage vs Human +12-20%, if players count as Human. Panzer Goblin (melee physical +6-10%) is the safe second card.

Armor ×2
Wanderer (melee physical damage taken -4.8-8%) against other melee classes; Pecopeco (Max HP +3-5%) otherwise.
Facewear

Backwear


Starcore traits, in priority order
Weapon
- Coiled Strike
- DMG vs Human%
- Melee PDMG%
- ATK%
Accessory
- DMG vs Human%
- Melee PDMG%
- Neutral DMG%
- ATK%
Armor
- DMG Reduction vs Demi-Human%
- Melee PDMG Reduction%
- Max HP%
- Ranged MDMG Reduction%
Cape
- DMG Reduction vs Demi-Human%
- Melee PDMG Reduction%
- Ranged PDMG Reduction%
- Elemental DMG Reduction%
Shoes
- DMG Reduction vs Demi-Human%
- Melee PDMG Reduction%
- Ranged PDMG Reduction%
- DEF%
Rune Engine
Pyro Crystal 7
DMG to all Classes +6%. Increases target's DMG taken by 4.5% and reduces healing received by 10% for 3 sec upon dealing DMG. This effect has a 15 sec cooldown. Dealing damage has a 30% chance to trigger a 2% all-element DMG boost for 6 sec, up to 5 stacksGeo Crystal 4
Reduces DMG received from all Classes by 3%Upon entering combat, gain a shield of 10% max HP every 15s, lasting 15s. Enemies attacking the shield have their P.ATK and M.ATK reduced by 3% for 5sAqua Crystal 4
Increases P.DMG and M.DMG by 4%. When dealing damage, ignores 5% of the target's P.DEF and M.DEF.Burst AmplificationIncreases burst skill DMG multiplier by 2~12%Burst Amplification: burst skill multiplier +12%. Clashing Spiral is a burst skill. Bloodthirsty BladeIncreases DMG multiplier by 4~24% to targets with HP above 70%Bloodthirsty Blade: +24% against targets above 70% HP. That is your opener.Abnormal Damage BoostIncreases DMG multiplier by 2~12% to targets with abnormal statusAbnormal Damage Boost: +12% against targets with a status, such as the Stun from Charge Attack.
 Fatal InjuryReduces target's healing received by 5~30% for 5s upon dealing DMG. 20s cooldownFatal Injury: the target's healing received -30% for 5 s (20 s cooldown), so a priest cannot save them in time.Desperate StrikeIncreases P.ATK and M.ATK by 2~12%. Reduces P.DEF and M.DEF by 2~12%Desperate Strike: P.ATK +12% for 12% less P.DEF. If you die first, swap it for Body Amplification (damage taken -18% above 80% HP).
Reroll affixes last: ATK%, melee physical damage, then damage reduction vs Demi-Human.
How to play
- Open with Charge Attack: with a spear it reaches 3 m farther and stuns. Then Clashing Spiral while the target cannot move.
- Put only Clashing Spiral, Burning Blood and Concentration on auto. Auto Magnum Break delays Clashing Spiral.
- Fight on the Peco Peco with Cavalry Training 5: Spear Mastery gives 50% more P.ATK while mounted, and Cavalry Training gives back the lost attack speed.
- Season stats (Aggressive, Defensive) do almost nothing outside Calamity Zone, so PvP starcores hold real stats only and colors don't need to match.
Still unknown
- Whether Sword Saint counts every skill used while holding a sword. The game tags only some skills as Sword skills (Bowling Bash, Aura Blade, Parrying, Sword Qi); Brave Strike and Traumatic Blow may not count.
- Sword Saint against Coiled Strike in real numbers. Nobody we found has tested the two Lord Knight traits side by side at Lv.90.
- Lv.90 stat numbers for Lord Knight. The stat lines here come from our Lv.70-80 builds and Taiwan's AGI 99 rule.
- Whether players count as Human (Hydra, Mirage: Dracula, DMG vs Human%) or Demi-Human (Mirage: Mistress, damage reduction traits). The game uses both words.
- Whether Burning Blood's shield turns on Unshakable Guard, and whether its Slow counts as a status for Lumina and Abnormal Damage Boost.
- Whether a weapon's Apocalypse traits stay with the item or with the slot when you switch between the three weapons.
- Whether SEA keeps Taiwan's Break and Guard targets, and whether SEA's Normal mode needs a tank at all.
- Which defensive traits roll on which slot in SEA. The defensive starcore lists follow the trait data we could read; if a trait never shows up for a slot, take the next one on the list.
Sources
- Bahamut: Lord Knight 2H AGI triple-trigger build, red skill order and runes (updated Apr 2026)2026-04
- Bahamut: Rending Wound and the AGI sword skill trio (Jul 2026)2026-07
- Bahamut: Can knights use other classes' Apocalypse traits? (May 2026)2026-05
- 1p2pstart: Swordman class guide, Taiwan server (knight as the only full tank)2026-01
- rtnw.online: Lord Knight builds, Tank, AGI and Spear2026-08
- PJVC: 2H AGI Lord Knight build, Lv.742026-08
- PJVC: Clashing Spiral Lord Knight build, 165M damage2026-08
- OWIISHII: Tank Lord Knight, Brave Strike sustain2026-08
- ronwguide: Level 90 and Apocalypse guide (Season 1 bosses, Break and Guard, class traits)2026-10
- ronwguide: Apocalypse trait database (values per trait)2026-10