Champion Apocalypse build: MVP, raid and PvP
ChampionAs of 13 October 2026 (SEA, Lv.90, Apocalypse Season 1)

Champion at Lv.90: Throw Spirit Sphere (Flick) with Spiritless Throw Spirit Sphere for MVPs and the Calamity Zone raid, and Asura Strike with Rapid Combo for PvP. Armor, Starcores, cards, special skills and runes for each mode.
Our take
The RO New World team's own view
- This page suits Champions who reach Lv.90 and want one build for MVPs and the raid, plus PvP players who like one huge hit. If you only farm with the Combo chain and never raid, our Lv.80 Combo build still works.
- First get an orange Claw III and roll Spiritless Throw Spirit Sphere on the weapon Starcore: range +2, no Spirit Sphere cost and skill damage +30%. Then the General Set II, then two Nile Rose III. PvP players start with Combo Battle Glove III and Rapid Combo.
- The biggest trap is taking the melee Combo build into the Calamity Zone. It has the shortest reach in the game, and on Taiwan's server players called it unfriendly in that raid and moved to Flick. Stay at range and keep Mental Strength ready for the big hits.
- Verdict: at Lv.90 the Champion becomes a Flick class for PvE. Spiritless Throw Spirit Sphere fixes its sphere problem and adds 30%, so Flick takes the MVP and raid slots. Asura Strike with Rapid Combo stays the PvP pick.
Key findings
Flick takes over PvE at Lv.90
Spiritless Throw Spirit Sphere gives range +2, no Spirit Sphere cost and +30% skill damage. You keep your 5 spheres, so Zen (P.ATK +5% per sphere) stays full and Mental Strength is always ready. On Taiwan's server, PvE Champions moved to Flick; pure Combo was seen as the weakest route. Our Lv.80 Combo pick stays for farming, but Flick is now our PvE main.
Rapid Combo also boosts Asura Strike
In the game data, Guillotine Fist (Asura Strike) carries the Combo tag. Rapid Combo gives Combo Skill DMG +30%, so it should boost Asura Strike too. Taiwan players already use the Combo Battle Glove for Asura for the same reason. Our Level 90 guide said no trait boosts Guillotine Fist; the tag says otherwise.
Damage against Demi-Human now exists
The current game data has Hydra Card (weapon, DMG vs Human% +12% to 20%), Mirage: Dracula Card (facewear, +3.6% to 6%) and an Apocalypse trait DMG vs Human% (4.05% to 6%, weapon and accessory). Three of the five raid bosses (Amon Ra, Pharaoh, Anubis) are Demi-Human, and players probably count as Demi-Human in PvP.
Armor
Wear the General Set II
General Set II
BestBest for MVP and raid



- Set: STR +5, DEX +5, PDMG Bonus +2.5%
- Each piece: P.DMG Bonus +2.2%, plus 0.4% per refine level
- The most physical damage of any Lv.91/92 set
Odin Set III
OptionPvP Asura Strike



- Set: STR +6, INT +6, ATK +2%, M.ATK +2%
- Each piece: ATK +1.4%, M.ATK +1.4%
- Armor refine: STR +1, INT +1 per level. INT means SP, and SP feeds Asura Strike
Gale Set IV
SkipOnly if you need more HP



- Set: HP Cap +5%, P.DMG Bonus +2%
- Each piece: AGI +6, ATK +28, plus P.DMG Bonus +0.38% per refine level
- Less damage than General; wear it only while you keep dying
Values are for orange (gold) quality. Royal pieces have the same bonuses plus Sif's Protection (Max HP equal to gear refine level x refine level x 5, up to Lv.15).
II · MVP hunting
MVP build: Flick (Throw Spirit Sphere)
Neutral · Spiritless Throw Spirit SphereThrow Spirit Sphere from range with the Claw III. The Apocalypse trait removes the sphere cost, so you throw without stopping, keep Zen's 5 spheres, and stay out of the MVP's melee reach.
Stats
STR 99
Max it first. The throw takes its ATK from STR, because knuckles are melee weapons; DEX does not add ATK here.
VIT: the rest
HP to survive MVP hits.
LUK (optional)
Some players put spare points in LUK for a little ATK (0.2 per point).
Apocalypse weapon trait
Spiritless Throw Spirit Sphere
Throw Spirit Sphere range +2, no Spirit Sphere consumption, skill DMG +5~30%Throw Spirit Sphere range +2, no Spirit Sphere cost, skill damage +30% (red; orange gives +20%). No sphere cost also means Zen's 5 spheres stay up for P.ATK +5% each, and you can throw during Mental Strength thanks to Featherlight.Gear
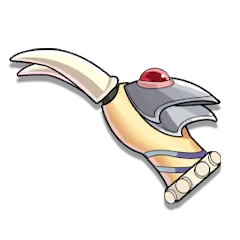 Claw IIILv.90 · ATK +233Throw Spirit Sphere DMG multiplier +14%, Ranged Physical DMG +7%
Refine +5, Throw Spirit Sphere DMG multiplier +7%, Ranged Physical DMG +4%Claw III: ATK +233, Throw Spirit Sphere DMG multiplier +14% and Ranged Physical DMG +7%. At +15 refine these grow to +21% and +11%. Better than Iron Nail V, which has no ranged damage bonus.
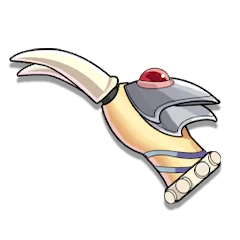 Royal Claw IIILv.90 · ATK +350Throw Spirit Sphere DMG multiplier +14%, Ranged Physical DMG +7%
Refine +5, Throw Spirit Sphere DMG multiplier +7%, Ranged Physical DMG +4%Royal Claw III is the long-term goal: ATK +350, the same bonuses, plus Thor's Edge (ATK equal to gear refine level x refine level, up to Lv.15).
General's Assault Armor IILv.91 · HP +8329P.DMG Bonus +2.2%For every Refine Lv. +1, P.DMG Bonus +0.4%General Set II (armor, cape, shoes): about P.DMG +2.2% per piece plus the set's PDMG +2.5%. See the armor section.
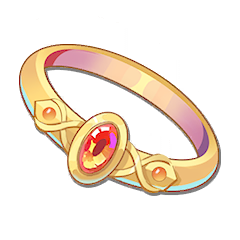 Nile Rose IIILv.90 · HP +1189 · ATK +33 · M.ATK +33All Elemental DMG +2.4%
For every Refine Lv. +1, All Attribute DMG +0.6%Nile Rose III x2: ATK +33, All Elemental DMG +2.4%, plus 0.6% per refine level. Taiwan's Flick players run two of them and skip the 2-piece set.
 Rogue's Treasure IIILv.90 · HP +1784 · ATK +50 · DEX +8P.DMG Bonus +2.8%
For every Refine Lv. +1, P.DMG Bonus +0.4%Alternative: Rogue's Treasure III + Cold Heart III (Rogue's Cold Set III: ATK +2%, Physical DMG +2%; Cold Heart ignores 35 P.DEF). Taiwan players found the two pairs close; test both on your own gear.
Special skills
 Scatter SnapWeaponAfter Throw Spirit Sphere hits, it scatters to 5 nearby targets; damage multiplier +0.8~44%Scatter Snap: after the throw hits, it scatters to 5 nearby targets, multiplier +44% (red Lv.3; orange Lv.3 is +32%). The best Flick special skill, even against one MVP.
 Twin SnapAccessoryThrow Spirit Sphere deals an additional hit, but damage multiplier is reduced by 33.5~49.7%Twin Snap: one extra hit per throw; the multiplier drops by 33.5% (red Lv.3) to 38% (orange Lv.3). Two hits still beat one.
 Knuckle MasteryAccessoryEquipping Knuckles increases DMG vs Large/Medium by 0.6~33% and DMG vs Small by 0.3~16.5%Knuckle Mastery: DMG vs Large and Medium +33%, vs Small +16.5% (red Lv.3). Claw III counts as knuckles, and most MVPs are Large.
 Elite GuardArmorDMG taken from MVP, Mini, and Boss -0.5~27.5%.Elite Guard: damage taken from MVP, Mini and Boss -27.5% (red Lv.3; orange Lv.3 is -20%).
 PDMG ReductionCapeWhen taking damage, PDMG taken -0.7~35.8% for 5s.PDMG Reduction: when you take damage, physical damage taken -35.8% for 5 s (red Lv.3).
 Infinite SnapAlternativeThrow Spirit Sphere restores 1 Spirit Sphere on hit; damage multiplier +0.8~44%Infinite Snap (+44% multiplier, refunds 1 sphere per hit): use it in place of Knuckle Mastery until your weapon has the Apocalypse trait.
Cards
Weapon ×2
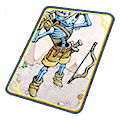
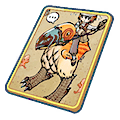
Minorous (DMG vs Large +18%) and Archer Skeleton (Ranged PDMG +10%). Swap Archer Skeleton for the race card of the MVP: Hydra for Demi-Human, Strouf for Demon, Pecopeco Egg for Formless.
Cape
Condor (ATK +10) is the cheap pick; Vagabond Wolf (STR +5, CRIT DMG +5%) is the upgrade.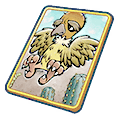



Accessory ×4
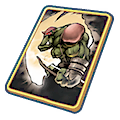
Zealotus (Ranged PDMG +6%) on every accessory slot, Orc Archer (Ranged PDMG +5%) while you can't afford it. The throw is ranged damage, so skip melee cards.





Starcore traits, in priority order
Weapon
- Spiritless Throw Spirit Sphere
- Ranged PDMG%
- Neutral DMG%
- ATK%
Accessory
- Ranged PDMG%
- Neutral DMG%
- ATK%
- Elemental DMG%
Armor
- Max HP%
- DMG Reduction vs Large%
- Melee PDMG Reduction%
- Neutral DMG Reduction%
Cape
- Melee PDMG Reduction%
- Elemental DMG Reduction%
- M.DEF%
- Received Healing%
Shoes
- Melee PDMG Reduction%
- DEF%
- Elemental DMG Reduction%
- Neutral DMG Reduction%
Rune Engine
Aqua Crystal 7
Increases P.DMG and M.DMG by 6%; Ignores 10% of target's P.DEF and M.DEF upon dealing DMG. Casting a skill has a base 15% chance to deal 40% bonus DMG. Failure adds 5% to the next attempt, stacking until triggered.Lumina Crystal 7
Increases healing effects and healing received by 12%; Reduces DMG taken by 10% when in abnormal status. Increases DMG dealt to targets in abnormal status by 10%. When receiving or applying healing effects, increase all control resistance of self and target by 15% and P.ATK and M.ATK by 8% for 8 sec Desperate StrikeIncreases P.ATK and M.ATK by 2~12%. Reduces P.DEF and M.DEF by 2~12%Desperate Strike, Lv.4: P.ATK +8%, P.DEF -8%. Taiwan's Flick players rank it first.
 Layered BladeStacks when dealing DMG. Each stack increases DMG by 0.8%, up to 20 stacks, lasting 10s. After acquiring , gain 5 stacks each time DMG is dealt.Layered Blade, Lv.4: +0.4% damage per stack, up to 20 stacks. Constant throwing keeps it full.
 Endure CounterIncreases DMG multiplier by 2~12% to targets with EndureEndure Counter, Lv.4: damage multiplier +8% against targets with Endure, which many bosses have.
 Balanced DefenseWhen HP is above 50%, DMG multiplier increases by 12%. When below 50%, DMG taken is reduced by 12%Balanced Defense, Lv.4: damage +8% above 50% HP, damage taken -8% below 50% HP.
 Single-Target AmplificationIncreases single-target skill DMG multiplier by 2~12%Single-Target Amplification, Lv.4: single-target skill multiplier +8%. Throw Spirit Sphere is a single-target skill in the game data.
Reroll affixes last, toward ATK%, ATK and Max HP%.
How to play
- Aqua 7 gives P.DMG +6%, ignores 10% P.DEF and adds a 15% chance per skill for +40% damage. Lumina 7 gives +10% damage to targets with a status effect and -10% damage taken while you have one.
- Cast Zen before the pull. With the trait, throwing no longer uses spheres, so all 5 stay up and give P.ATK +5% each while you deal damage.
- Starcore traits outside the raid: take the best roll of each trait you want and ignore the color. Aggressive and Defensive are worth almost nothing outside the Calamity Zone.
- On Taiwan's server, a player who swapped an orange Lv.2 Scatter Snap for a red Lv.2 Piercing Snap lost about 600,000 damage in a 2-minute dummy test. Keep Scatter Snap.
III · Calamity Zone raid
Raid build: Flick with Guard first
Neutral · Spiritless Throw Spirit SphereThe same Flick build, set up for the Calamity Zone. Range keeps you away from the boss mechanics, and Mental Strength lets you keep throwing through the big hits. Build Guard (Defensive) before Break (Aggressive).
Stats
STR 99
Same as the MVP build.
VIT: the rest
More HP matters more than a little extra damage here. A dead Champion does no damage.
Apocalypse weapon trait
Spiritless Throw Spirit Sphere
Throw Spirit Sphere range +2, no Spirit Sphere consumption, skill DMG +5~30%Range +2, no sphere cost, skill damage +30%. In the raid, the free spheres matter most: Mental Strength (5 spheres, physical and magic damage taken -90% for 10 s) is always ready, and Featherlight lets you keep throwing while it is up.Gear
Claw IIILv.90 · ATK +233Throw Spirit Sphere DMG multiplier +14%, Ranged Physical DMG +7%Refine +5, Throw Spirit Sphere DMG multiplier +7%, Ranged Physical DMG +4%Claw III: Throw Spirit Sphere multiplier +14%, Ranged Physical DMG +7%. On Taiwan, a Lv.90 Royal two-handed weapon also carried about 125 Break and 50 Guard.
General's Assault Armor IILv.91 · HP +8329P.DMG Bonus +2.2%For every Refine Lv. +1, P.DMG Bonus +0.4%General Set II for damage. If you keep dying, wear the Gale Set IV (HP Cap +5%) until your Guard is high enough.
Nile Rose IIILv.90 · HP +1189 · ATK +33 · M.ATK +33All Elemental DMG +2.4%For every Refine Lv. +1, All Attribute DMG +0.6%Nile Rose III x2: All Elemental DMG +2.4%, plus 0.6% per refine level.
 Cold Heart IIILv.90 · HP +1784 · ATK +50 · STR +8Ignore P.DEF +35
Refine +5, Ignore P.DEF +1.4%Cold Heart III (with Rogue's Treasure III): ignores 35 P.DEF, plus 4.2% at +10 refine. The pair to try if raid bosses feel tanky.
Special skills
Scatter SnapWeaponAfter Throw Spirit Sphere hits, it scatters to 5 nearby targets; damage multiplier +0.8~44%Scatter Snap: scatters to 5 nearby targets, multiplier +44% (red Lv.3). Also clears adds such as Amon Ra's Mummies.Twin SnapAccessoryThrow Spirit Sphere deals an additional hit, but damage multiplier is reduced by 33.5~49.7%Twin Snap: one extra hit per throw, multiplier -33.5% (red Lv.3).Knuckle MasteryAccessoryEquipping Knuckles increases DMG vs Large/Medium by 0.6~33% and DMG vs Small by 0.3~16.5%Knuckle Mastery: DMG vs Large +33% (red Lv.3). All five Season 1 bosses are Large. Large Monster GuardArmorDMG taken from large units -0.5~27.5%.Large Monster Guard: damage taken from Large units -27.5% (red Lv.3). Every raid boss is Large.Elite GuardCapeDMG taken from MVP, Mini, and Boss -0.5~27.5%.Elite Guard: damage taken from MVP, Mini and Boss -27.5% (red Lv.3).
Cards
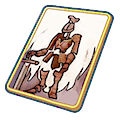
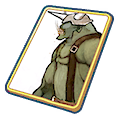
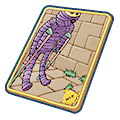
Weapon ×2
Minorous (DMG vs Large +18%) for all five bosses, plus Hydra (DMG vs Human +20%) for Amon Ra, Pharaoh and Anubis. Swap Hydra for Santa Poring (vs Shadow) on Bloody Knight and Strouf (vs Demon) on Dark Lord.
Cape
Headwear
Starcore traits, in priority order
Weapon
- Spiritless Throw Spirit Sphere
- Aggressive
- Ranged PDMG%
- Neutral DMG%
Accessory
- Aggressive
- Ranged PDMG%
- Neutral DMG%
- DMG vs Human%
Armor
- Defensive
- DMG Reduction vs Large%
- DMG Reduction vs Demi-Human%
- Max HP%
Cape
- Defensive
- DMG Reduction vs Demi-Human%
- Shadow DMG Reduction%
- Elemental DMG Reduction%
Shoes
- Defensive
- DMG Reduction vs Demi-Human%
- Undead DMG Reduction%
- DEF%
Off-hand
- Defensive
- Max HP%
- DMG Reduction vs Demi-Human%
- Melee PDMG Reduction%
Rune Engine
Aqua Crystal 7
Increases P.DMG and M.DMG by 6%; Ignores 10% of target's P.DEF and M.DEF upon dealing DMG. Casting a skill has a base 15% chance to deal 40% bonus DMG. Failure adds 5% to the next attempt, stacking until triggered.Lumina Crystal 7
Increases healing effects and healing received by 12%; Reduces DMG taken by 10% when in abnormal status. Increases DMG dealt to targets in abnormal status by 10%. When receiving or applying healing effects, increase all control resistance of self and target by 15% and P.ATK and M.ATK by 8% for 8 secLayered BladeStacks when dealing DMG. Each stack increases DMG by 0.8%, up to 20 stacks, lasting 10s. After acquiring , gain 5 stacks each time DMG is dealt.Layered Blade, Lv.4: +0.4% damage per stack, up to 20 stacks.Endure CounterIncreases DMG multiplier by 2~12% to targets with EndureEndure Counter, Lv.4: damage multiplier +8% against targets with Endure.Single-Target AmplificationIncreases single-target skill DMG multiplier by 2~12%Single-Target Amplification, Lv.4: single-target skill multiplier +8%.Balanced DefenseWhen HP is above 50%, DMG multiplier increases by 12%. When below 50%, DMG taken is reduced by 12%Balanced Defense, Lv.4: damage +8% above 50% HP, damage taken -8% below 50% HP. Mighty GuardWhen taking single DMG exceeding 10% of max HP, reduces DMG by 4~24%. 15s cooldownMighty Guard, Lv.4: a single hit over 10% of your Max HP is reduced by 16% (15 s cooldown). Replaces Desperate Strike, which lowers your defense.
Reroll affixes last, toward Max HP%, ATK% and ATK.
How to play
- Guard before Break: get Defensive on armor, cape and shoes to Guard 80, then 160, before you chase Break. On Taiwan, Guard under 240 on Hard added 90% damage taken.
- Stellar Power: when all 4 traits on a slot share one quality, the slot's season stat grows (blue +30%, purple +50%, orange +70%, red +100%). In the raid, keep matching colors.
- Use Mental Strength for the big boss hits. It takes 5 spheres and stops other skills for 10 s, but with Featherlight you keep throwing. Zen refills the spheres right after.
- The game text says that with a two-handed weapon, the off-hand Apocalypse slot also takes effect. Knuckles look two-handed (no shield), so we list an off-hand Starcore for its Guard. Test it before you spend on it.
- Start with Amon Ra and Dark Lord. Bloody Knight and Anubis need Break 160 to 240 on Normal.
IV · PvP
PvP build: Asura Strike with Rapid Combo
Forced Neutral · Rapid ComboClose in with Body Relocation and delete one player with Guillotine Fist (Asura Strike). Its damage is [(150 + remaining SP/10) x 100%] of ATK, so you build SP and ATK, and Rapid Combo adds 30% because the skill has the Combo tag.
Stats
INT 99
INT gives SP, and every 10 SP adds 100% to the Asura Strike multiplier.
STR: the rest
ATK still multiplies the whole hit, so don't drop it.
Apocalypse weapon trait
Rapid Combo
Combo Skill DMG +5~30%Combo Skill DMG +30% (red; orange +20%). Guillotine Fist carries the Combo tag in the game data, so this is the trait for Asura Strike as well as for the combo chain.Gear
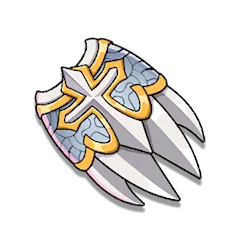 Combo Battle Glove IIILv.90 · ATK +233Combo Skill DMG multiplier +14%
Refine +5, Combo Skill DMG multiplier +7%Combo Battle Glove III: ATK +233, Combo Skill DMG multiplier +14% (+21% at +15 refine). Asura Strike is a Combo skill, so this glove boosts it; Studded Knuckles V gives the same +14% to Asura Strike but nothing to the rest of the chain.
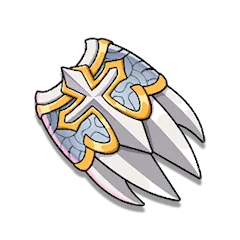 Royal Combo Battle Glove IIILv.90 · ATK +350Combo Skill DMG multiplier +14%
Refine +5, Combo Skill DMG multiplier +7%Royal Combo Battle Glove III: ATK +350 and Thor's Edge (ATK equal to gear refine level x refine level, up to Lv.15).
Odin's Blessing IIILv.91 · HP +8329ATK +1.4%, M.ATK +1.4%For every Refine Lv. +1, STR +1, INT +1, P.DMG Bonus +0.24%, and M.DMG Bonus +0.24%Odin Set III: STR +6, INT +6, ATK +2% for the set, and the armor adds STR +1 and INT +1 per refine level.
Nile Rose IIILv.90 · HP +1189 · ATK +33 · M.ATK +33All Elemental DMG +2.4%For every Refine Lv. +1, All Attribute DMG +0.6%Nile Rose III x2: ATK +33, All Elemental DMG +2.4%, plus 0.6% per refine level. Put SP gems (Cat's Eye) in the enchant slots instead of chasing a set.
Special skills
 Sura AuraWeaponAfter casting Guillotine Fist, Fury state is not removed; Fury grants P.ATK +0.6~33%Sura Aura: Fury stays on after Guillotine Fist, and Fury gives P.ATK +33% (red Lv.3; orange Lv.3 is +24%). You are ready for the next fight sooner.
 Infinite ComboAccessoryEach Combo skill grants 1 Spirit Sphere; Combo Skill DMG multiplier +0.6~33%Infinite Combo: Combo Skill DMG multiplier +33% (red Lv.3) and 1 Spirit Sphere per combo skill.Knuckle MasteryAccessoryEquipping Knuckles increases DMG vs Large/Medium by 0.6~33% and DMG vs Small by 0.3~16.5%Knuckle Mastery: DMG vs Large and Medium +33%, vs Small +16.5% (red Lv.3).
 Duelist GuardArmorDMG taken from players -0.5~27.5%.Duelist Guard: damage taken from players -27.5% (red Lv.3; orange Lv.3 is -20%).PDMG ReductionCapeWhen taking damage, PDMG taken -0.7~35.8% for 5s.PDMG Reduction: physical damage taken -35.8% for 5 s after you are hit (red Lv.3).
 Acupoint MasteryAlternativePDMG Bonus +0.6~33%, hits reduce target MSPD by 15% for 3sAcupoint Mastery (PDMG +33%, hits slow the target's MSPD by 15% for 3 s): take it over Knuckle Mastery if your targets keep running.
Cards
Weapon ×2
Hydra (DMG vs Human +20%) and Skeleton Worker (DMG vs Medium +18%).

Accessory ×4
Phendark (Melee PDMG +6%), or Bongun (+5%). Taiwan players prefer cards whose random affix rolls SP.

Headwear



Backwear

Starcore traits, in priority order
Weapon
- Rapid Combo
- Melee PDMG%
- DMG vs Human%
- Neutral DMG%
Accessory
- Melee PDMG%
- DMG vs Human%
- Neutral DMG%
- ATK%
Armor
- DMG Reduction vs Demi-Human%
- Ranged PDMG Reduction%
- Max HP%
- Neutral DMG Reduction%
Cape
- DMG Reduction vs Demi-Human%
- Ranged MDMG Reduction%
- M.DEF%
- Elemental DMG Reduction%
Shoes
- DMG Reduction vs Demi-Human%
- Melee PDMG Reduction%
- DEF%
- Elemental DMG Reduction%
Rune Engine
Aqua Crystal 7
Increases P.DMG and M.DMG by 6%; Ignores 10% of target's P.DEF and M.DEF upon dealing DMG. Casting a skill has a base 15% chance to deal 40% bonus DMG. Failure adds 5% to the next attempt, stacking until triggered.Pyro Crystal 7
DMG to all Classes +6%. Increases target's DMG taken by 4.5% and reduces healing received by 10% for 3 sec upon dealing DMG. This effect has a 15 sec cooldown. Dealing damage has a 30% chance to trigger a 2% all-element DMG boost for 6 sec, up to 5 stacksDesperate StrikeIncreases P.ATK and M.ATK by 2~12%. Reduces P.DEF and M.DEF by 2~12%Desperate Strike, Lv.4: P.ATK +8%, P.DEF -8%. Bloodthirsty BladeIncreases DMG multiplier by 4~24% to targets with HP above 70%Bloodthirsty Blade, Lv.4: damage multiplier +16% against targets above 70% HP. Your opening punch lands on a full-HP target.Single-Target AmplificationIncreases single-target skill DMG multiplier by 2~12%Single-Target Amplification, Lv.4: single-target skill multiplier +8%.Balanced DefenseWhen HP is above 50%, DMG multiplier increases by 12%. When below 50%, DMG taken is reduced by 12%Balanced Defense, Lv.4: damage +8% above 50% HP, damage taken -8% below 50% HP.Layered BladeStacks when dealing DMG. Each stack increases DMG by 0.8%, up to 20 stacks, lasting 10s. After acquiring , gain 5 stacks each time DMG is dealt.Layered Blade, Lv.4: +0.4% damage per stack, up to 20 stacks. Fill it with combo hits before the big punch.
Reroll affixes last, toward ATK%, ATK and Max HP%, then damage reduction vs Demi-Human.
How to play
- Pyro 7 gives DMG to all Classes +6%, makes the target take +4.5% for 3 s, and can stack +2% all-element damage. On Taiwan, players said to use Pyro only if you can reach 7.
- After Guillotine Fist you are in Spirit Exhaustion for 10 s. Step back, use Spiritual Cadence (30% HP and SP over 3 s) and come back with full SP.
- Never punch a Crusader or Paladin with reflect up. On Taiwan, Crusaders were the one class Asura players avoided.
- In PvP, Guillotine Fist also deals 10% of the target's current HP. Flick wins at range, so in big group fights a Flick Champion is safer; Asura is for picking off one target.
Still unknown
- Exact Lv.90 stat numbers. No source gives them. Our rule: STR 99 and VIT for Flick, INT 99 and STR for Asura Strike.
- Whether Rapid Combo really boosts Guillotine Fist. The game data tags it as a Combo skill and Taiwan players use the Combo glove for it, but we found no test of the trait itself.
- Whether knuckles are two-handed. Their ATK matches the two-handed weapons and no Champion build uses a shield, so we list no off-hand cards. The game text says a two-handed weapon also uses the off-hand Apocalypse slot; nobody has confirmed it for knuckles.
- Whether Zen's P.ATK +5% per sphere stays full with Spiritless Throw Spirit Sphere. It should, since the throw no longer uses spheres, but we found no test.
- Whether Elemental DMG% and Nile Rose's All Elemental DMG count for Neutral attacks. Taiwan players say every class except casters uses all-element damage, so we assume yes.
- Whether players count as Demi-Human and Medium in this game. The PvP cards and traits assume they do, as in classic Ragnarok.
- How Flick compares with Combo in the SEA raid. Taiwan players moved to Flick, but no damage numbers from Calamity Zone are public.
Sources
- Bahamut: Champion guide, Flick, Asura and Combo (Taiwan server)2026-04
- Bahamut: Is Monk the strongest now? Flick vs Asura (Taiwan server)2026-05
- Bahamut: About Monk, Spirit Exhaustion and Flick in PvP (Taiwan server)2026-04
- Bahamut: Asura Strike damage swings and stat priority (Taiwan server)2026-06
- Bahamut: What element DMG% Apocalypse traits boost (Taiwan server)2026-05
- Bahamut: Apocalypse weapon traits list (Taiwan server)2026-04
- Gameplay.tips: TSB Monk comprehensive build guide (Lv.110 server)2026-10
- ronwguide: Level 90 and Apocalypse preparation guide2026-10