Apocalypse builds for every class
As of 13 October 2026 (SEA, Lv.90, Apocalypse Season 1)
Our Level 90 and Apocalypse Season 1 plan for all 13 classes in Ragnarok: The New World SEA: armor set, weapon, Apocalypse trait, special skills, cards, Starcore traits and runes for MVP hunting, Calamity Zone raids and PvP.
Our take
The RO New World team's own view
- This is for every player at or near Lv.90 who wants one clear plan before spending Starcores, Divine Crystals and refine materials. Pick your class below; each page has three builds: MVP hunting, the Calamity Zone raid and PvP.
- Do the weapon first. Your class trait only rolls on the weapon, and it is the biggest single Apocalypse bonus. Then accessories for damage, then armor, cape and shoes for Guard.
- The biggest trap is spending on Break before Guard, or chasing perfect red defensive rolls. A dead player does no damage, and Season 1 Starcores fade when Season 2 starts.
- Our verdict: build one strong weapon with the right trait, keep two swappable weapon cards for each MVP, and match the four trait qualities only on the gear you take into the raid.
Pick your class
 Lord KnightMVP buildRaid buildPvP build
 PaladinMVP buildRaid buildPvP build
 High WizardMVP buildRaid buildPvP build
 SniperMVP buildRaid buildPvP build
 ClownMVP buildRaid buildPvP build
 GypsyMVP buildRaid buildPvP build
 High PriestMVP buildRaid buildPvP build
 ChampionMVP buildRaid buildPvP build
 Assassin CrossMVP buildRaid buildPvP build
 WhitesmithMVP buildRaid buildPvP build
 CreatorMVP buildRaid buildPvP build
 Night WatchMVP buildRaid buildPvP build
 AlitheaMVP buildRaid buildPvP build
Rules for every class
- 1Guard before BreakIn the Calamity Zone, Guard keeps you alive and Break unlocks your damage. Activate Apocalypse on armor, cape and shoes first and raise Guard to 80, then 160. Below the Break target your damage drops hard; below the Guard target you take much more damage.
- 2Outside the raid, real stats onlySeason stats (Aggressive, Defensive, Break and Guard) are ten times stronger inside the Calamity Zone and almost nothing outside it. On the gear you take to MVPs and PvP, fill all 4 trait slots with real damage or defense stats.
- 3The class trait stays on one weaponApocalypse traits belong to the item they are on. If you play two styles (for example one for bosses and one for PvP), that means two Apocalypse weapons. If you can afford only one, take the trait that also works in your second mode.
- 4Same quality for Stellar PowerEach slot holds 4 different traits. When all 4 share one quality, Stellar Power adds +30% (blue) up to +100% (red) to that slot's season stats. This matters only in the raid; outside it, take the best roll of each trait and ignore the color.
- 5Two weapon cards, swapped per bossUse one race card and one size card (or a card for the boss's element). Different bonus types multiply instead of adding up. Card text that says DMG works for physical attacks and spells; PDMG is physical only and MDMG is magic only.
Calamity Zone Season 1: what each boss needs
 Amon RaDemi-Human · Earth
- Break
- None
- Guard
- None
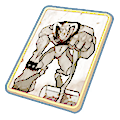
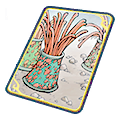
No Break or Guard needed. The best first boss for a new party.
 PharaohDemi-Human · Shadow
- Break
- 80
- Guard
- 80
Raydric Card on the cape cuts his Shadow damage.
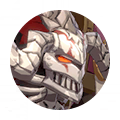 Bloody KnightFormless · Shadow
- Break
- 160
- Guard
- 80

Formless and Shadow: Pecopeco Egg or Santa Poring as the second card.
 Dark LordDemon · Undead
- Break
- 160
- Guard
- 160

Taiwan players call him the easiest of the five once you meet the targets.
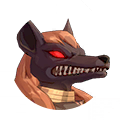 AnubisDemi-Human · Undead
- Break
- 240
- Guard
- 160
The hardest. Missing the Break target costs about 40% of your damage.
Hard mode needs about 320 Break and 240 to 320 Guard; Nightmare about 560. Bring a priest: Sanctuary is the party's main way to survive.
Weapon cards for every MVP
 AngelingLv.40 · Angel · Medium · HolySkeleton Worker + Revived Abysmal Knight
 DevilingLv.40 · Demon · Medium · ShadowStrouf + Santa Poring
 Golden Thief BugLv.60 · Insect · Large · FireCaramel + Minorous
 MayaLv.60 · Insect · Large · EarthCaramel + Minorous
 DrakeLv.60 · Undead · Medium · UndeadSkeleton Worker + Revived Abysmal Knight
 Goblin LeaderLv.60 · Demi-Human · Medium · WindHydra + Skeleton Worker
 MistressLv.60 · Insect · Small · WindCaramel + Desert Wolf
 PhreeoniLv.80 · Brute · Large · NeutralGoblin + Minorous
 Orc LordLv.80 · Demi-Human · Large · EarthOrc Lady + Hydra
 Orc HeroLv.80 · Demi-Human · Large · EarthOrc Lady + Hydra
 OsirisLv.80 · Undead · Medium · UndeadSkeleton Worker + Revived Abysmal Knight
 EddgaLv.100 · Brute · Large · FireGoblin + Minorous
 DoppelgangerLv.100 · Demon · Medium · ShadowStrouf + Santa Poring
 Amon RaLv.100 · Demi-Human · Large · EarthHydra + Minorous
 Moonlight FlowerLv.100 · Demon · Medium · FireStrouf + Skeleton Worker
 ChimeraLv.110 · Brute · Large · FireGoblin + Minorous
 BaphometLv.120 · Demon · Large · ShadowStrouf + Santa Poring
 DraculaLv.120 · Demon · Large · ShadowStrouf + Santa Poring
 AtroceLv.120 · Brute · Large · ShadowGoblin + Santa Poring
 KrakenLv.130 · Fish · Large · WaterFlora + Minorous
 PharaohLv.130 · Demi-Human · Large · ShadowHydra + Santa Poring
 Dark LordLv.130 · Demon · Large · UndeadStrouf + Minorous
 Owl BaronLv.130 · Demon · Large · NeutralStrouf + Minorous
 Bloody KnightLv.130 · Formless · Large · ShadowPecopeco Egg + Santa Poring
No time to swap? Revived Abysmal Knight Card adds +10% damage to every Boss, MVP and Mini and never needs changing. Minorous Card (damage vs Large +10.8 to 18%) fits 16 of these 24 MVPs.